Maintaining Solid Bricks for Longevity and Structural Integrity
Introduction
Solid bricks are a popular choice for construction due to their strength, durability, and long-lasting nature. However, like any building material, solid bricks require regular maintenance to ensure their longevity and structural integrity. In this blog post, we will explore essential tips and techniques for maintaining solid bricks, covering key aspects such as cleaning, sealing, repointing, and addressing common issues. By implementing proper maintenance practices, you can protect your solid brick structures from damage, extend their lifespan, and maintain their aesthetic appeal.
Cleaning Solid Bricks:
Cleaning solid bricks is an essential part of their maintenance to preserve their appearance and structural integrity. Over time, dirt, grime, moss, and other pollutants can accumulate on the brick surfaces, detracting from their natural beauty. Regular cleaning not only enhances the aesthetic appeal of solid bricks but also helps prevent potential damage. Here are some key steps to follow when cleaning solid bricks:

Prepare the Cleaning Solution: Start by preparing a suitable cleaning solution. For general cleaning, a mixture of mild dish soap and water can be effective. Use approximately 1 tablespoon of dish soap per gallon of water. For tougher stains, specialized brick cleaners are available, which can be purchased from hardware stores. Follow the instructions provided by the manufacturer for dilution ratios.
Test on a Small Area: Before applying the cleaning solution to the entire surface of the solid bricks, it is important to test it on a small, inconspicuous area first. This allows you to ensure that the cleaning solution does not cause any discoloration or damage to the bricks.
Scrubbing and Rinsing: Using a stiff-bristled brush or a pressure washer set at a low pressure, gently scrub the bricks with the cleaning solution. Work in small sections to ensure thorough coverage. Pay attention to areas with visible stains or buildup. Avoid using wire brushes or abrasive materials that may scratch the bricks. Once you have scrubbed a section, rinse it thoroughly with clean water. This helps remove the loosened dirt and cleaning solution from the surface of the bricks.
Removing Efflorescence: Efflorescence, a white powdery residue on the brick surface, can occur due to salt deposits. To remove efflorescence, you can use a mild acid-based cleaner or a mixture of water and vinegar. Apply the solution to the affected areas and scrub gently. Be cautious when working with acid-based cleaners, as they can be harmful. Follow the instructions provided by the manufacturer and wear appropriate protective gear, such as gloves and goggles. After cleaning, rinse the area thoroughly with clean water to remove any residue.
Preventing Future Stains: To protect the solid bricks from staining and moisture penetration, consider applying a brick sealer or water repellent. These products create a protective barrier that helps prevent the absorption of water, dirt, and other contaminants into the bricks. Follow the manufacturer's instructions for proper application of the sealer or water repellent. Be sure to clean and dry the bricks thoroughly before applying the product. Allow sufficient drying time before exposing the bricks to moisture or heavy use.
Regular Maintenance: Regular maintenance is key to keeping solid bricks clean and in good condition. Schedule periodic cleaning sessions to remove dirt and prevent the buildup of stains. Additionally, inspect the bricks for any signs of damage or deterioration, such as cracks or loose mortar. Promptly address any issues to prevent further damage and ensure the long-term integrity of the brickwork.
By following these steps and incorporating regular cleaning into your solid brick maintenance routine, you can keep your bricks looking their best and extend their lifespan. Remember to use appropriate cleaning solutions, test on a small area, scrub gently, rinse thoroughly, and consider using a protective sealer to maintain the beauty and durability of your solid bricks.
Sealing Solid Bricks:
Sealing solid bricks is an important step in their maintenance to protect them from moisture, weathering, and potential damage. Applying a sealer helps to enhance the longevity and structural integrity of the bricks. Here are the key steps to follow when sealing solid bricks:
Choosing the Right Sealer: Selecting the appropriate sealer is crucial to ensure effective protection for your solid bricks. There are different types of sealers available, including penetrating sealers and film-forming sealers. Consider the specific needs of your bricks and consult with a professional or a knowledgeable supplier to determine the best sealer for your project. Factors to consider include the porosity of the bricks, desired appearance, and the level of protection required.
Surface Preparation: Before applying the sealer, it is essential to properly prepare the surface of the solid bricks. Start by cleaning the bricks thoroughly to remove any dirt, dust, or stains. You can use a mild detergent solution and a soft-bristle brush or a pressure washer set at a low pressure. Ensure that the bricks are completely dry before proceeding with the sealing process.
Applying the Sealer: Follow the manufacturer's instructions for the specific sealer you have chosen. Generally, the process involves the following steps:
a. Pour the sealer into a roller tray or a suitable container. b. Use a brush or a roller to apply the sealer evenly to the surface of the bricks. Work in small sections to ensure proper coverage. c. Apply the sealer in thin coats rather than a thick layer, as this allows for better penetration and adhesion. d. Pay special attention to mortar joints, as they are more susceptible to water penetration. Ensure that the sealer adequately covers the joints. e. Allow the first coat to dry according to the manufacturer's instructions. This typically takes a few hours, but the exact drying time may vary depending on the sealer. f. Apply additional coats if recommended by the manufacturer. Multiple thin coats provide better protection than a single thick coat.
Curing and Drying Time: Once the sealer has been applied, it needs sufficient time to cure and dry. This process allows the sealer to bond with the bricks and create a protective barrier. Follow the manufacturer's instructions for the recommended curing and drying time. It is important to avoid any moisture exposure during this period, as it may affect the performance of the sealer.
Regular Maintenance: Periodically inspect the sealed bricks for any signs of wear or damage. Over time, the sealer may start to degrade due to weathering or foot traffic. If you notice any areas where the sealer has worn off or is no longer providing adequate protection, consider reapplying the sealer. Regular maintenance and resealing will help to ensure the continued longevity and effectiveness of the sealer.
Remember, the frequency of resealing will depend on various factors such as the type of sealer used, environmental conditions, and the level of wear and tear on the bricks. It is advisable to follow the manufacturer's recommendations and consult with professionals to determine the best maintenance schedule for your specific situation.
By following these steps and properly sealing your solid bricks, you can provide them with the necessary protection against moisture, weathering, and potential damage. Sealing not only enhances the durability and lifespan of the bricks but also helps maintain their appearance and structural integrity over time.
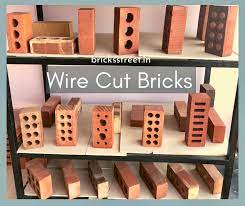
Also Read: wirecut bricks
Repointing Solid Bricks:
Repointing solid bricks is an essential maintenance process that involves repairing damaged or deteriorated mortar joints between the bricks. Over time, mortar joints can weaken, crack, or erode, compromising the structural integrity of the brickwork. Repointing helps restore the strength and stability of the brickwork and prevents further damage. Here are the key steps to follow when repointing solid bricks:
Assessing the Mortar Joints: Start by thoroughly inspecting the mortar joints between the solid bricks. Look for signs of crumbling, cracking, or gaps between the bricks. Identify the areas that require repointing and assess the extent of the damage. It is important to address any underlying issues causing the deterioration, such as moisture intrusion or structural movement.
Removing the Old Mortar: Carefully remove the old and damaged mortar from the joints using appropriate tools such as a chisel, grinder, or mortar rake. Take care not to damage the surrounding bricks during this process. Remove the old mortar to a depth of around 10-12mm to ensure sufficient space for the new mortar to bond effectively.
Mixing New Mortar: Prepare a batch of fresh mortar that matches the composition and color of the existing mortar. It is crucial to use the correct mortar mix to ensure compatibility and proper adhesion. Consult a professional or refer to local building codes for guidance on the appropriate mortar mix ratios for your specific application.
Repointing the Joints: With the old mortar removed, use a pointing trowel or a mortar jointing tool to fill the cleaned-out mortar joints with the new mortar. Press the mortar firmly into the joints, ensuring complete coverage. Fill the joints in small sections at a time to prevent the mortar from drying out before it can be properly tooled.
Finishing and Curing: Once the new mortar is in place, shape and smooth the joints using a pointing trowel or a specialized jointing tool. This helps create a neat and uniform appearance while ensuring optimal bonding between the bricks. Pay attention to achieving a consistent depth and profile across the repointed joints. After finishing, allow the mortar to cure and dry according to the recommended time frame provided by the manufacturer. Protect the repointed area from excessive drying or moisture exposure during the curing process.
Protecting the Repointed Area: To prevent premature drying and ensure proper curing, consider covering the repointed area with a damp cloth or plastic sheeting. This helps maintain the moisture level in the new mortar, promoting stronger bonds and reducing the risk of cracking. Avoid any disturbance or heavy loads on the repointed joints until the mortar has fully cured.
Regular Maintenance: Periodically inspect the repointed joints for any signs of deterioration or damage. Address any issues promptly to prevent further problems. Regular maintenance, including cleaning and resealing if necessary, will help prolong the lifespan and structural integrity of the repointed brickwork.
It is important to note that repointing solid bricks can be a labor-intensive task and may require specialized skills. If you are unsure about the process or the extent of the repair required, it is recommended to consult with a professional mason or brickwork specialist who can assess the condition of your brickwork and provide expert guidance and assistance. Proper repointing ensures the stability, aesthetics, and longevity of your solid brick structures.
Also Read: traditional brick
Addressing Common Issues:
Solid brick structures may face specific issues that require timely attention to maintain their longevity and structural integrity. Here are a few common issues and their recommended solutions:
Efflorescence: Efflorescence refers to the white powdery residue that appears on the surface of bricks. It occurs when water-soluble salts within the bricks or mortar dissolve and migrate to the surface, leaving behind the salt deposits as the water evaporates. To address efflorescence, follow these steps:
- Remove the efflorescence using a stiff brush or a mild acid-based cleaner specifically designed for brickwork.
- Identify and address any underlying moisture issues, such as water infiltration or improper drainage, to prevent further efflorescence.
- Consider applying a breathable sealer or water repellent to the brick surface to minimize water absorption and reduce the recurrence of efflorescence.
Cracks and Settlement: Over time, solid brickwork may develop cracks or experience settlement due to various factors, including structural movement, temperature changes, or inadequate foundation support. It is essential to address these issues promptly to prevent further damage. Here are some recommended solutions:
- Evaluate the severity and extent of the cracks. Minor surface cracks can be repaired using appropriate sealants or fillers, while significant or structural cracks may require the expertise of a professional mason or structural engineer.
- Determine the cause of settlement, such as foundation issues, and consult with a qualified professional to assess and rectify the underlying problem.
- Consider reinforcing the affected areas with steel or masonry reinforcement techniques to enhance the structural stability of the brickwork.
Mold and Mildew Growth: Solid bricks in damp and shaded areas are susceptible to mold and mildew growth. These fungi not only detract from the appearance but can also lead to structural deterioration and health issues. To address mold and mildew growth:
- Use a mold and mildew cleaner specifically designed for brick surfaces to remove the growth. Follow the instructions provided by the manufacturer.
- Improve ventilation in affected areas to minimize moisture buildup. Consider installing exhaust fans or dehumidifiers if necessary.
- Trim vegetation near brick walls to increase sunlight exposure and airflow, as excessive shade and vegetation can contribute to dampness.
Damage from Vegetation: Overgrown vegetation, such as vines or tree roots, can cause damage to solid brickwork. The roots can penetrate mortar joints and create cracks or dislodge bricks. To prevent damage from vegetation:
- Regularly trim and maintain vegetation near brick walls, ensuring that there is sufficient clearance between plants and the brickwork.
- Remove any roots that penetrate mortar joints to prevent further damage.
- Consider installing barriers, such as root barriers or metal mesh, to prevent roots from reaching the brickwork.
Stains and Discoloration: Solid bricks can develop stains and discoloration due to environmental factors, pollution, or improper cleaning methods. To address stains and discoloration:
- Clean the affected areas using appropriate cleaning solutions and methods. Avoid harsh chemicals or abrasive materials that may damage the bricks.
- If stains persist, consider using specialized stain removers or consulting with a professional brick cleaner.
- Apply a suitable brick sealer or water repellent to protect the surface from future staining and facilitate easier cleaning.
Regular inspections and maintenance practices are vital to identify and address these common issues promptly. By addressing them early on, you can preserve the longevity, appearance, and structural integrity of your solid brick structures. When in doubt or for complex issues, it is recommended to consult with professionals or experts in the field for accurate assessment and guidance.

Comments
Post a Comment