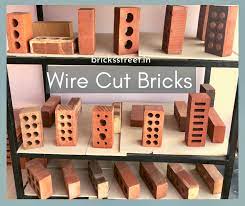
DIY Projects Using Wire Cut Bricks by BricksStreet
Welcome to the world of BricksStreet, where the charm of wire cut bricks brings an unparalleled aesthetic to your home projects. BricksStreet's authentic wire cut bricks are not just building materials; they're a statement of style, durability, and history. In this blog, we'll dive into some exciting DIY projects that you can embark on using these exquisite bricks.
Project 1: A Rustic Garden Wall
A garden wall made from BricksStreet's wire cut bricks not only enhances your outdoor space but also adds a touch of timeless elegance. Here's how you can build one:
Plan Your Wall: Decide on the size and shape. A straight wall is easier for beginners, while a curved wall can add a dynamic touch.
Prepare the Foundation: Dig a trench about 6 inches deep and fill it with a layer of gravel for drainage.
Lay the First Row of Bricks: Use a mortar mix to set your bricks. Make sure they're level and straight.
Continue Building Up: Lay each subsequent row of bricks, staggering the joints for stability.
Finish with Style: Once you reach the desired height, you can add a special touch with a row of bricks set at a different angle for a decorative finish.
Project 2: Charming Brick Pathway
Create a winding path through your garden or a straight walkway to your front door.
Design Your Path: Plan the route and width. A standard pathway is about 2 feet wide.
Excavate the Path Area: Remove about 7 inches of soil to make room for the base and bricks.
Lay the Base: Fill with 4 inches of crushed stone, then add a layer of sand for leveling.
Place the Bricks: Lay the bricks in your chosen pattern, tapping them gently into place.
Fill the Joints: Sweep sand over the bricks to fill in the gaps, and then hose it down lightly to settle the sand.
Project 3: Cozy Fire Pit
A fire pit can be the focal point for evening gatherings in your backyard.
Choose the Right Spot: Find a safe, level area away from structures and overhanging trees.
Lay the Foundation: Dig a circular trench, fill it with gravel, and tamp it down.
Build the Pit Walls: Arrange the BricksStreet wire cut bricks in a circular pattern, layering them with fire-resistant mortar.
Add the Finishing Touches: For a polished look, add a layer of coping stones on top.
Safety and Preparation
Before embarking on these projects, remember to always wear safety gear, like gloves and goggles. Preparation is key, so measure twice and cut once!
Conclusion
BricksStreet's wire cut bricks are not just building blocks, but a medium for creativity and expression. These DIY projects will not only enhance the beauty of your home but also offer the satisfaction of creating something lasting and personal. Dive into the world of DIY with BricksStreet and transform your space into a reflection of your style and elegance. Happy building!


Comments
Post a Comment